
Getting started with Freshfront
Freshfront puts badges on your products and builds collections from the same rules. Setup is three steps. The app’s Home page ticks each one off as you go, so you can always see what’s left.
1. Switch Freshfront on in your theme
Badges reach your shop through an app embed in your theme. Until it’s on, nothing shows, however many badges you build. Do this first.
- Open Freshfront. You land on Home.
- Select Switch Freshfront on. Your theme editor opens on the App embeds panel.
- Switch on the Turn Freshfront on toggle.
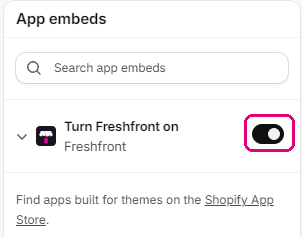
- Select Save in the top right of the theme editor.

- Go back to the Freshfront tab. Home checks your theme again and the first step turns green.
Changing your live theme later? Switch Freshfront on in the new one too. Each theme keeps its own setting.
2. Create a badge
- Select Create badge.
- Choose a Badge type. Freshfront fills in the rule for you. Sale, for example, picks out every product with a compare-at price.
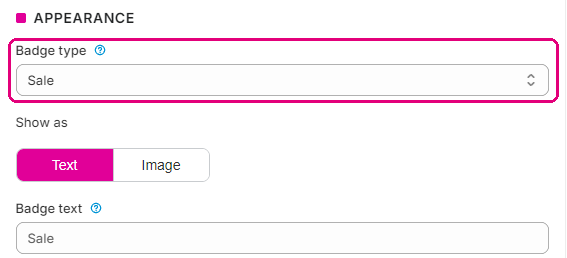
- Change the Badge text, colours or shape if you like, and check the preview.
- Select Save.
The badge types article explains what each type catches. For finished examples, try one of the recipes.
3. Check a product on your shop
Open a product the badge should cover and look at the main image. The badge sits in the corner you chose. You’ll see it on collection pages, search results and your home page too.
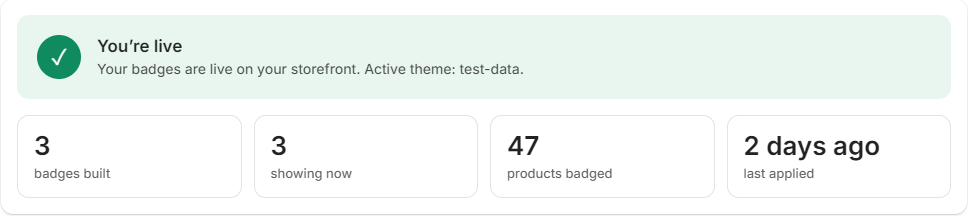
When everything is set up, Home shows a green message.
Nothing there? Work through badges not showing on your shop.